How to Export Schedule and Import into ADP Workforce Now
The following article is intended for ADP Workforce Now clients who need to export MakeShift schedule and import into ADP Workforce Now.
Exporting Department Schedules
Select the Schedules link from the top navigation bar.
![]()
Choose your desired department by clicking the Name of the department.

Once you are viewing the week you would like to export, click Download Schedule in the bottom right corner.
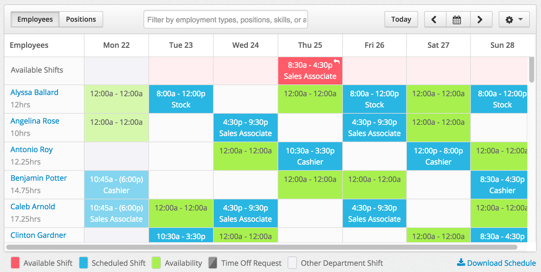
A notification will appear, allowing you to choose which program to export your schedule to. Select ADP Schedule (Beta).
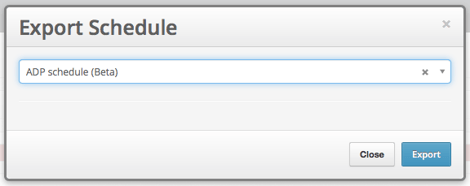
This will automatically download a .CSV file with your schedule content. *Note: Do not save the exported file in Excel as this will corrupt the format of this flat file. It is best to import the file into ADP directly from your Downloads folder without saving a new copy to your computer.
Importing into ADP Workforce Now
To import into ADP, log into Workforce Now at workforcenow.adp.com. You will need to have Practitioner or Limited Practitioner rights.
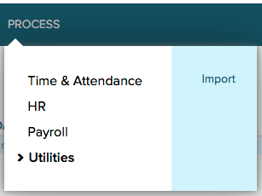
Select Process from the top navigation bar.

The following options will vary depending on your role within ADP Workforce Now. Select Utilities and choose Import.
*Before your first import, you will need to follow the following steps:
On your left pane, select Time and Attendance.
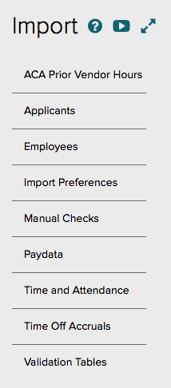
Once you are in your Time and Attendance settings, select Import Preferences.

Select New Preference on the right side.
![]()
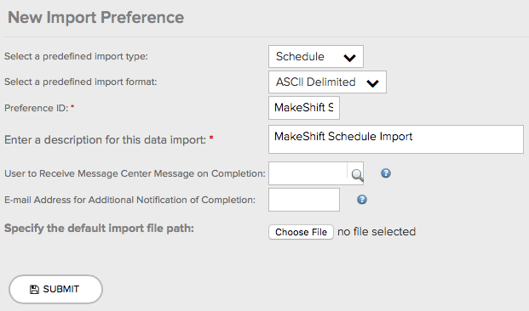
Under "Select a predefined import type," click Schedule. Choose a "Preference ID." This can be "MakeShift Schedule Import" or whatever you prefer. Enter a brief description and click Submit. Like mentioned earlier, this only needs to be done once before your first import.
*For all further imports:
Begin by selecting Time and Attendance on your left pane. Select New Import.
![]()
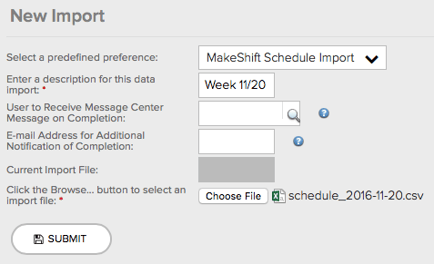
Select your predefined preference that you have created for MakeShift. Enter a description and select the exported file from MakeShift. This is typically found in your Downloads folder on your computer. Click Submit.
If your import is successful, you will see a green check mark with a confirmation message, and it will display if there were any errors.
![]()
