How to Configure Your Location’s Profile & Date of Pay Settings
If you have not already created your new location, click on the Locations tab from the top navigation bar.
![]()
Click on the green Add Location button.
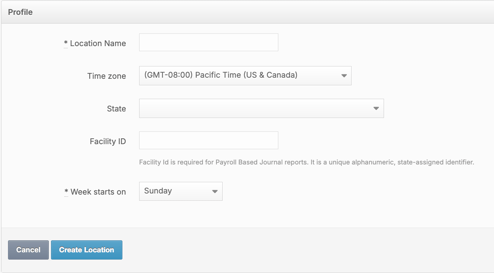
io9From here, you will want to give your location a Name, Time Zone, Province/State, Facility ID, *Week starts on, Date of Pay.

If your Location already exists within your MakeShift account, then click on the location you would like to configure additional profile information for.

Click on the grey Edit Location button.
![]()
You may fill in any missing details from your location profile.

Next, you may indicate the day of the week that your schedule should start on for your new location by selecting the Week starts on the dropdown menu. You may select any day from Monday to Sunday. Please ensure this day is in alignment with your company’s pay period dates. If you are unsure of your pay period dates, please defer to your company administrator.

Lastly, you may update your Date of Pay setting for your new location by selecting the drop down menu. Here, you will have the option to select either Start Day or Majority. If Start Day is selected, then your payroll calculations will be based on the start date of the shift and/or time punch. If Majority is selected, the payroll calculation will be based on the date where the majority of the shift/punch takes place. For example, you may have a scheduled shift on December 31st from 11pm to 7am. In this instance, even though the shift starts on December 31st, the majority of the shift takes place on January 1st, so the payroll calculations will be based on any rules that apply to the January 1st date. *If Majority is selected, it cannot be changed.

Once you have configured all of the profile settings for your new location, you may click the blue Update Location button to save the information.

