Adding a Rotation from the Department Schedule
Rotations are a great way of creating schedules for employees who generally work a set pattern of shifts. Rotations can be used for weekly rotations, monthly rotations, or rotations of any length that suit your business requirements.
Before you assign a rotation to an employee's schedule, the rotation template needs to be created first. For more information on creating rotations please read our article on Creating a Rotation.
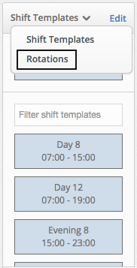
To schedule a rotation for an employee, go to your Department Schedule and click on the Shift Templates dropdown arrow to the left of the weekly schedule. Switch the view from Shift Templates to Rotations.

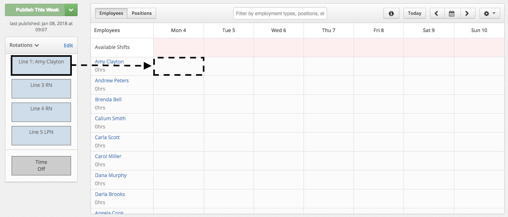
Drag the Rotation template you would like to add to the employee's schedule and drop it on the calendar on the day you would like the rotation to begin. Remember what day you chose as Day 1 of the rotation. We recommend that Day 1 of the rotation corresponds with the first day of the schedule week (Ex. Sunday or Monday).

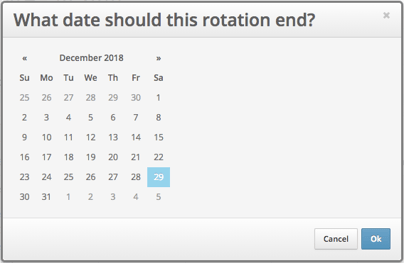
Select the date when you would like the rotation to end and click the blue OK button.

You will receive a warning message to let you know that the rotation is loading and to not navigate away from this page. The rotation will take longer to load depending on how far into the future you chose to schedule it to.

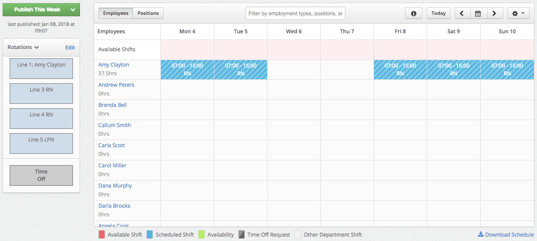
Once the rotation has loaded, you will see diagonal lines over all of the shifts. This is letting you know that this is a pending schedule that has not yet been published. The shifts are automatically saved so you can leave the page and come back at any time, however the employee will not see this new rotation until you publish it. Click the green Publish this Week button at the top left corner to publish one week at a time, or click on the dropdown arrow to choose to publish a specific date range or the entire rotation at once. (Keep in mind that clicking the publish button will publish all other pending shifts, not just the new rotation).

